
He likes to use reference books and make things that look real. The foam was really soft and easy to push the skewers through which meant he didn't need to ask for help and manged it himself. He was really pleased with the result.


 Half term we took the boys to a space centre. They loved it and have been space mad since they got home. Our eldest decided as soon as he got home that he wanted to make the planets.

 A night time activity. You need a dark room, torches and coloured cellophane (or coloured torches!!) and your camera. Set your camera to slow exposure or fireworks setting. Place the coloured cellophane over the light, attach with elastic bands. Then get your kids to grab torches and see what they can draw in the 3 - 10 seconds the camera gives you. When they see the photos they are amazed, but just jumping around with torches in the dark is exciting enough. Squiggles were the favourite but we did try some shapes, fish, flowers and writing names.
 We have had lots of snow over the last few days, so crafts have been forgotten for snow fun!! Todays crafty activity was crayon shavings. I placed crayons and a grater on the table and the box for recycling/junk/craft!!.
  A little help was needed with grating the crayons but as they were big and chunky and we only ever managed half a crayon no little fingers were hurt. First step was grating lots of colours, we mixed all the colours but i'm sure putting the seperate would give some very cretaive results. First he tried putting glue on the tubes and boxes and sprinkling on the crayon, then rolling it in the colour. Both were fun and gave good effects.
  After he had covered a few things in crayon he decided it looked like a giant daddy. So then he set to work creating his giant.Green arms (he asked for a clean board to grate the crayon on as they had to be green), a belt, chin and big ears were added. The crayon then was used to draw the face and our giant crayon daddy was complete.
  STEP 1: Party plates make this craft slightly less messy and give a rainbow look to the colours. We fill each section with a mixture of food colouring and water. The more colouring you add the darker it is. STEP 2:Boys choose the colours from the box and choose weather to add one colour or a mix of colours to each one. STEP3: Next its time to get either kitchen roll or (heavy/expensive) toilet roll (the thin toilet paper just turns to mush). The boys then fold or roll the paper as they choose.
 OTHER OPTION: use a paint brush to dab the colour on. It still spreads out and can give more control
 STEP 4:Dip corners/edges into the different coloured dye. Don't hold it in too long just in and out. They are always amazed as the colour seeps up the through the paper.
 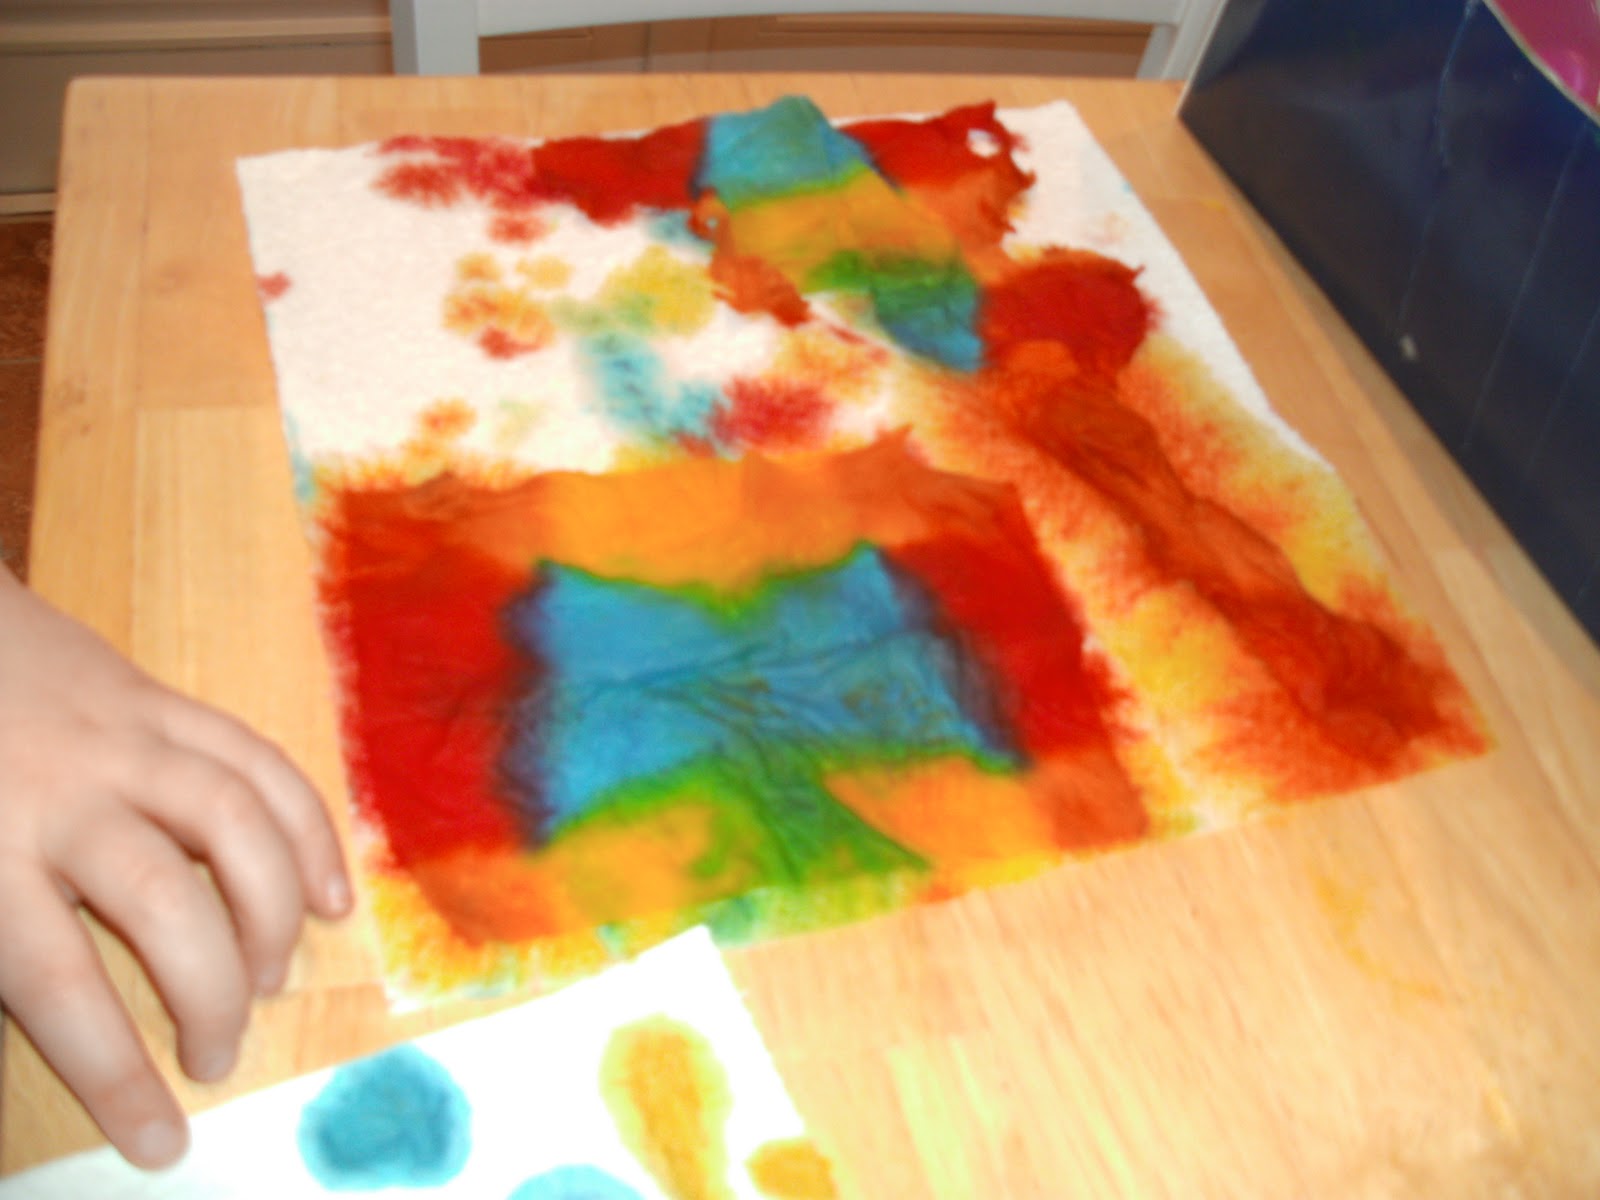 STEP 5: As each piece of paper is dyed its mum or dads turn to very carefully open up the paper. Once open place on a piece of kitchen towel to dry. This works better than newspaper as it soaks the excess colour away and nothing gets smudged. Also you get extra pieces of paper as the bottom piece usually soaks up enough colour to look good on its own.
  STEP6: Once dry its suitable for all sorts of projects. We tore up the dyed paper and rolled into balls , stuck onto a printed dinosaur shape and displayed.


