
He likes to use reference books and make things that look real. The foam was really soft and easy to push the skewers through which meant he didn't need to ask for help and manged it himself. He was really pleased with the result.


 Half term we took the boys to a space centre. They loved it and have been space mad since they got home. Our eldest decided as soon as he got home that he wanted to make the planets.

 A night time activity. You need a dark room, torches and coloured cellophane (or coloured torches!!) and your camera. Set your camera to slow exposure or fireworks setting. Place the coloured cellophane over the light, attach with elastic bands. Then get your kids to grab torches and see what they can draw in the 3 - 10 seconds the camera gives you. When they see the photos they are amazed, but just jumping around with torches in the dark is exciting enough. Squiggles were the favourite but we did try some shapes, fish, flowers and writing names.
 We have had lots of snow over the last few days, so crafts have been forgotten for snow fun!! Todays crafty activity was crayon shavings. I placed crayons and a grater on the table and the box for recycling/junk/craft!!.
  A little help was needed with grating the crayons but as they were big and chunky and we only ever managed half a crayon no little fingers were hurt. First step was grating lots of colours, we mixed all the colours but i'm sure putting the seperate would give some very cretaive results. First he tried putting glue on the tubes and boxes and sprinkling on the crayon, then rolling it in the colour. Both were fun and gave good effects.
  After he had covered a few things in crayon he decided it looked like a giant daddy. So then he set to work creating his giant.Green arms (he asked for a clean board to grate the crayon on as they had to be green), a belt, chin and big ears were added. The crayon then was used to draw the face and our giant crayon daddy was complete.
  STEP 1: Party plates make this craft slightly less messy and give a rainbow look to the colours. We fill each section with a mixture of food colouring and water. The more colouring you add the darker it is. STEP 2:Boys choose the colours from the box and choose weather to add one colour or a mix of colours to each one. STEP3: Next its time to get either kitchen roll or (heavy/expensive) toilet roll (the thin toilet paper just turns to mush). The boys then fold or roll the paper as they choose.
 OTHER OPTION: use a paint brush to dab the colour on. It still spreads out and can give more control
 STEP 4:Dip corners/edges into the different coloured dye. Don't hold it in too long just in and out. They are always amazed as the colour seeps up the through the paper.
 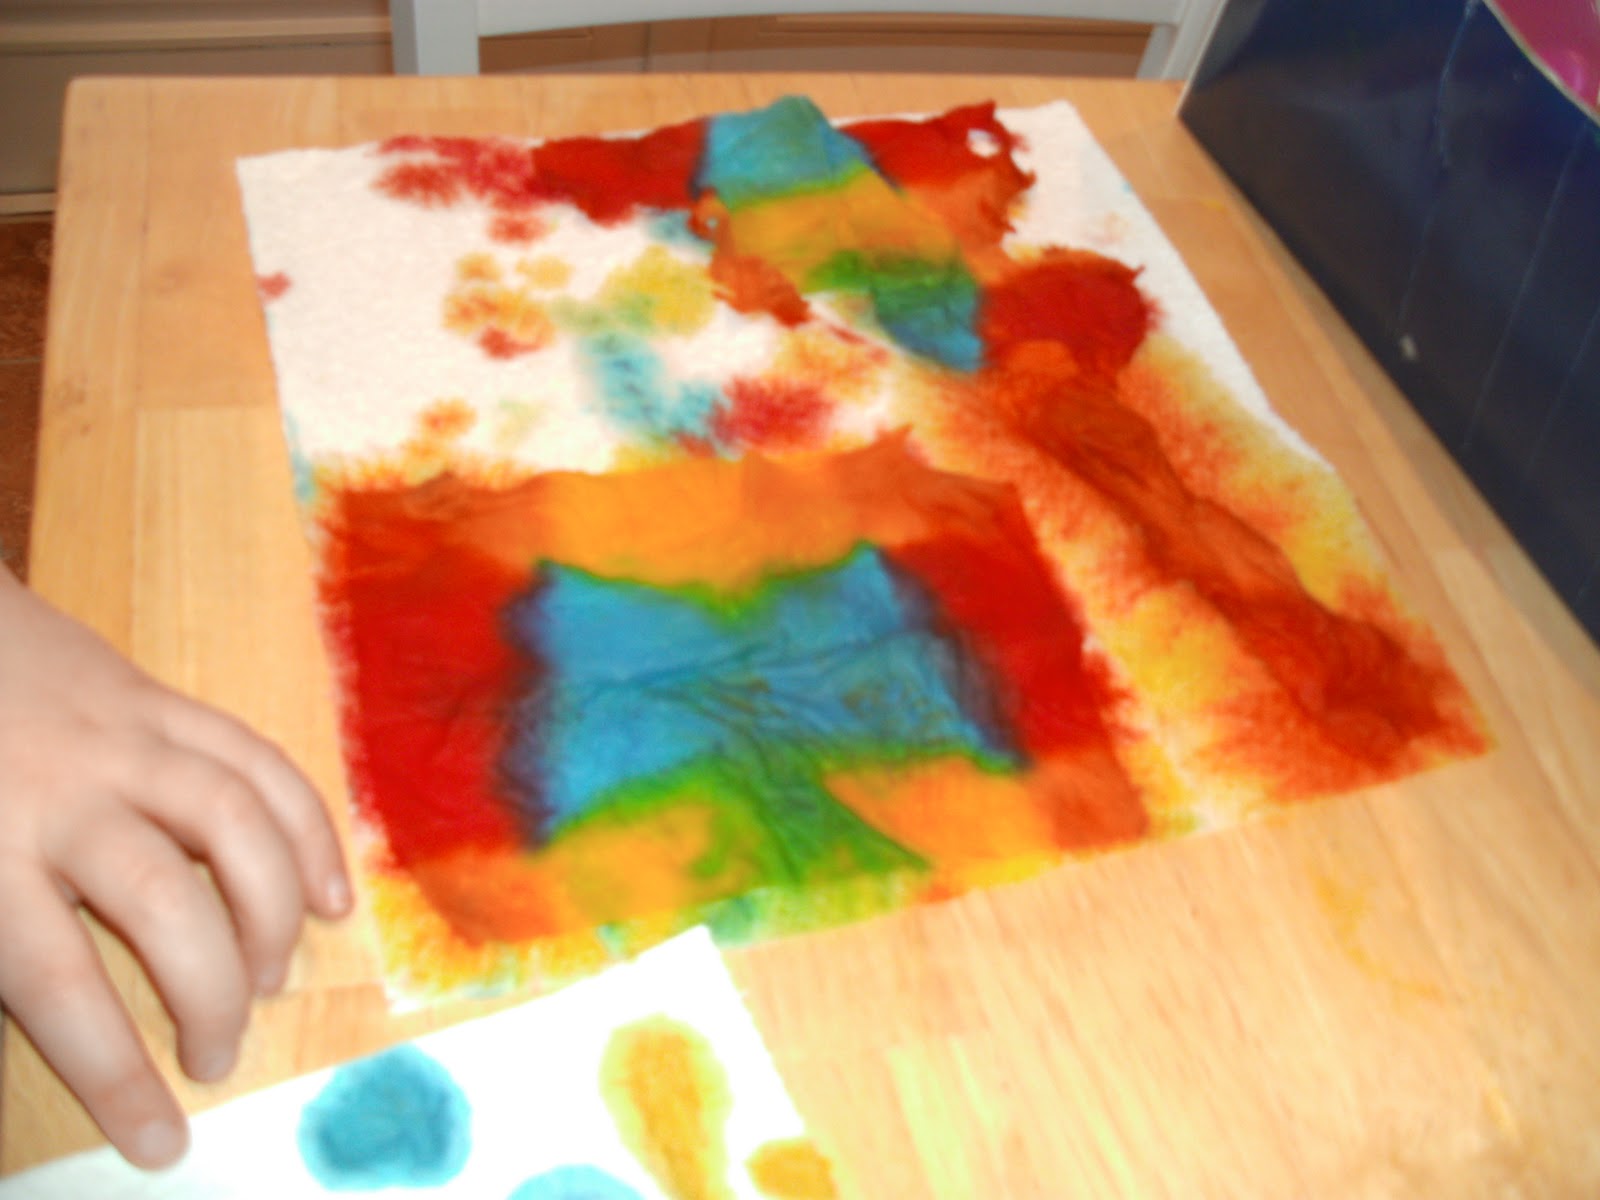 STEP 5: As each piece of paper is dyed its mum or dads turn to very carefully open up the paper. Once open place on a piece of kitchen towel to dry. This works better than newspaper as it soaks the excess colour away and nothing gets smudged. Also you get extra pieces of paper as the bottom piece usually soaks up enough colour to look good on its own.
  STEP6: Once dry its suitable for all sorts of projects. We tore up the dyed paper and rolled into balls , stuck onto a printed dinosaur shape and displayed.


 I am not a fan of phonics being the main system for teaching reading - which it is at the school the boys attend - and although only in nursery they have started to learn letters and are sounding out words. He is really enjoying it and has been asking to read words that he sees. A couple of weeks ago I dug out a tree poster we had made when teaching the oldest son to read and quickly printed out comon words on dinosaurs. When interest arises we have brought out 3 or 4 new words and played some games to encourage him to read/memorise these words.
 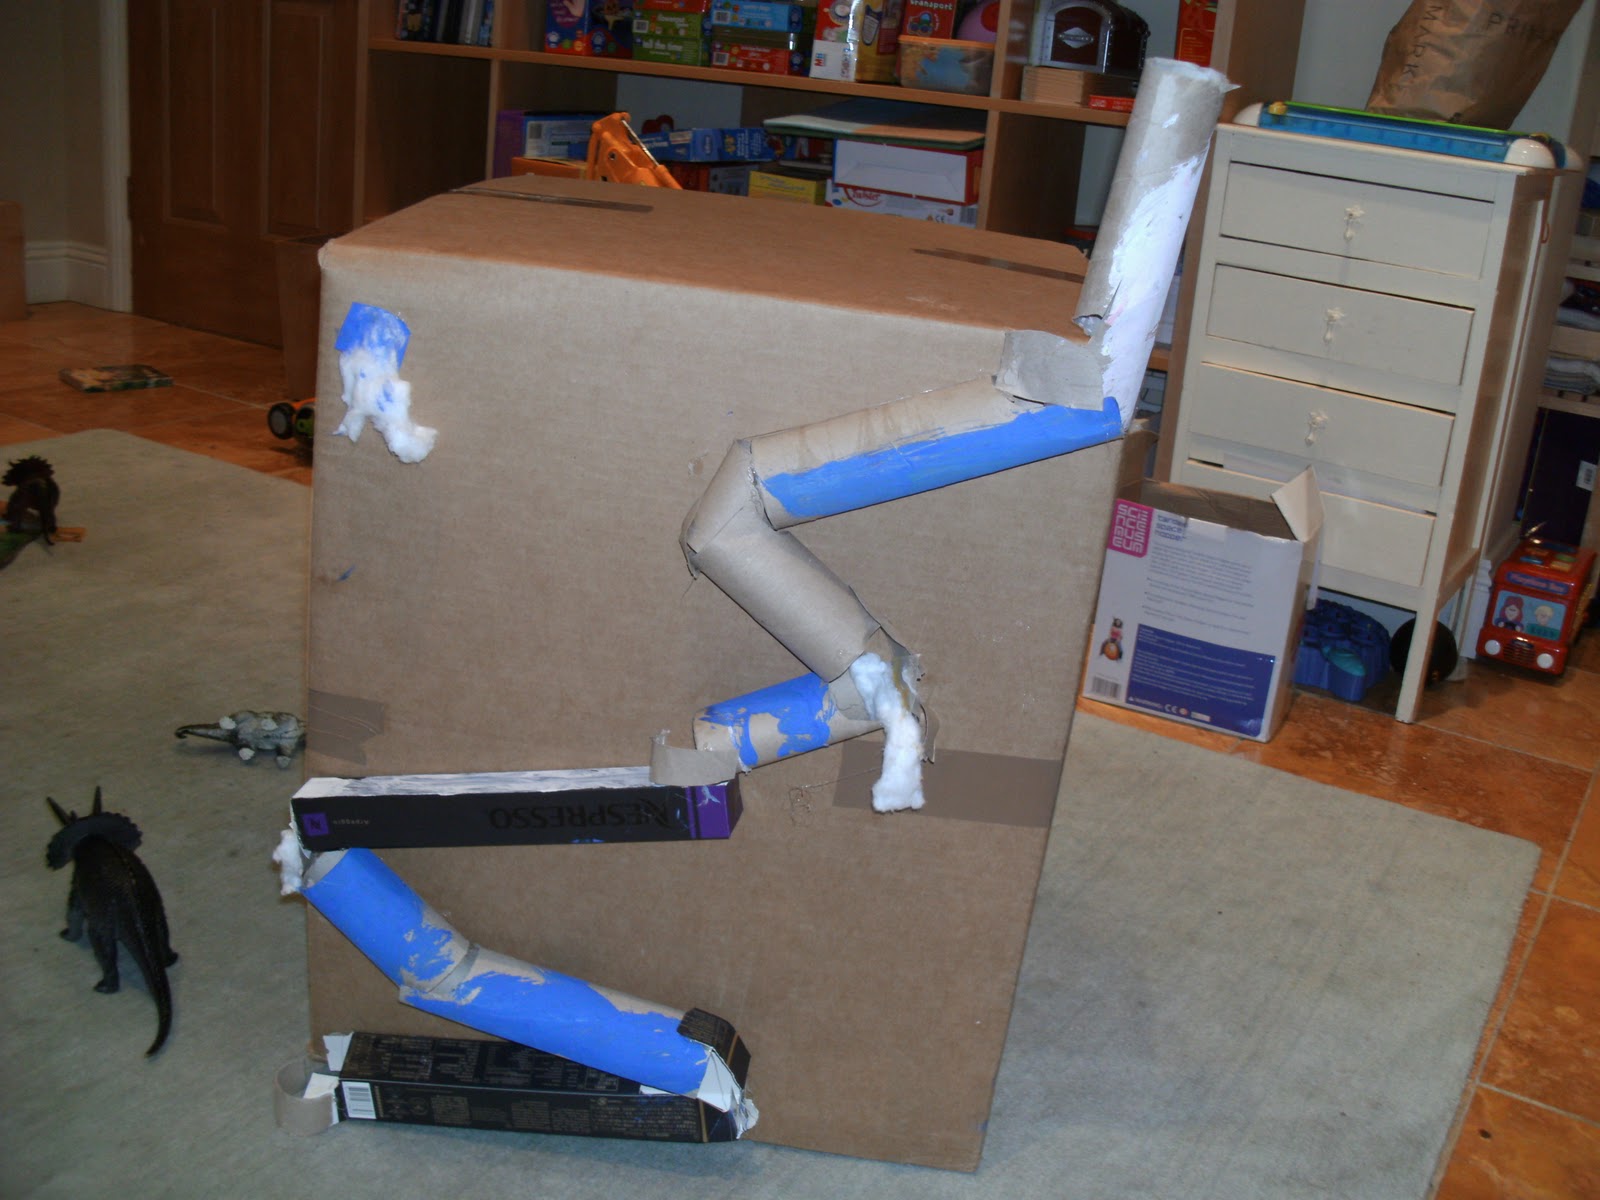 Both the younger boys love marbles and with the arrival of some coffee boxes and a collection of tubes we set to work on a marble run. Blue was the chosen colour and each piece was given a quick coating. The older of the boys kept telling his little brother how it made it more exciting for the marble!! while the youngest kept saying "wow" (he's only 1 and not at sentence level yet!) in reaction to his brothers excited voice. Anyway, after lots of painting the hot glue gun came out (youngest was distracted with the bag of marbles and an ice cube tray) and we stuck on the pieces going down the box. Sometimes he glued and I held in place, sometimes I was allowed!! to glue. After a few experiments to check the piece were in the right place, we set to work making bumpers so the marbles couldn't escape. These consisted of the cut away pieces of tubing and some cotton wool! his choice. The finished run was quite impressive and the boys were excited to show big brother when he came home. This then led to our shop bought marble run being brought out and an extravagant marble run being built next to the box. They really wanted to build it on top of the box and have the marbles drop from one to the other, but little one kept climbing into the box and knocking the whole thing down. This is maybe a task for when dad is home or youngest is having a rare nap.
 Then we went outside and drew a large number line on the driveway. We placed an alien on the number line and choose a number card to take away (alien had to be on a number between 10 and 20 and the number cards were from 0 - 9). We started of on the alien card and jumped down the correct number. Then we started on the number of the card we had drawn and jumped up the number we needed to see how many we needed to add on to get to the alien. (if number card was 8 we started at 8 and jumped up to alien who was on 12. sum 12-8= 4: 8 jump up to 12 is 4.) We did each sum both ways to ensure his understanding was there.
 One of the kids got a new science kid for Christmas. His school project at the moment is light and dark, so he asked if we could try out making some light.
 We started off by covering a balloon with kitchen towel dipped in a mix of glue, blue food colouring and water. This would be the world. We normally dry paper machie on top of the aga as it dries amazingly fast - so not thinking that's where the balloon went. But NOT a good idea half an hour later a big bang sent us into the kitchen to find the world had blown up!! Blue coloured paper covered the kitchen. After blowing up another balloon and recovering it in the rescued bits of paper, we had almost saved the world!! It wasn't quite as good as the first attempt but the kids had spent ages on it so I decided we would continue and see what happened.
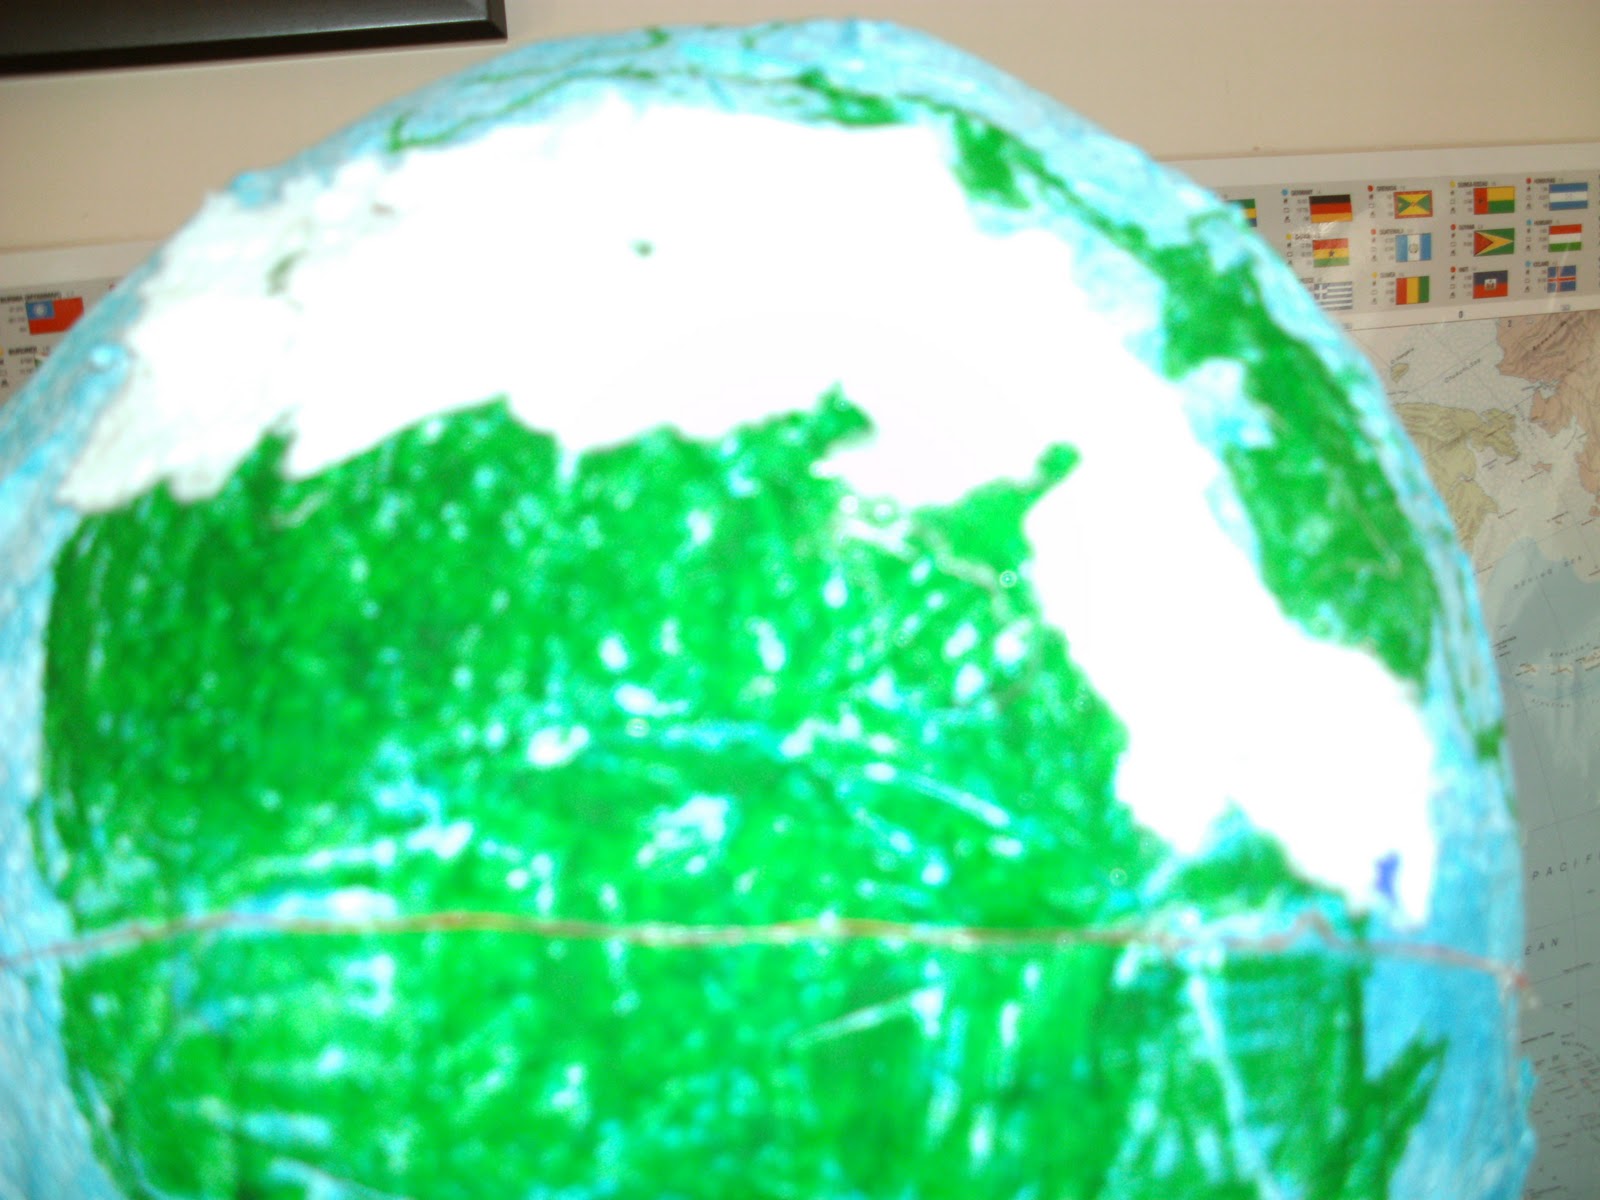 Day 2 - balloon dry and fairly solid. We set to work drawing in the continents. I had printed and cut out the correct sized shapes so the boys drew around these, using a globe and world map poster to position them correctly. The boys used red thread to represent the equator. This helped them to work out positions. When we thought we had a good representation we started to colour the continents with pen. We had to finish off with paint as all the green pens manged to run out.
  We had to rescue Africa when the youngest had gone a bit wild with the pens! A bit of blue paint rescued the situation.
 Foam stickers were found in the sticker drawer and with a very useful animal globe and some of the kids books we found out where our animal stickers homes were. Youngest had great fun sticking on the stickers while his brother was busy on the computer. each continent was labelled (and places that the kids were particularly interested in).